 Alice in Wonderland Nails! Inspired by Disney's Trippy Movie :)
 Colors you need:
Black, white, yellow, red, light green, dark green, light purple, dark purple and blue.
What I Used:
Sally Hansen Double Duty Base & Top Coat
China Glaze Yellow Polka Dot Bikini
Opi Black Onyx
China Glaze Gothic Lolita
China Glaze Sweet Hook
China Glaze Boy Toy Blue
Milani White Canvas
China Glaze Kiwi Cool-Ada
All other colors I needed, I used acrylics for.
Dotting tools
Fine nail art brush
 |
| After applying your base coat, paint your thumb white, your index finger with a white tip, your middle finger with a light purple tip, your ring finger with a dark green tip and your pinky with a yellow tip. |
 |
| Paint a thin light green line on top of your dark green tip, a white line on top of your yellow tip and a dark purple line on top of your light purple tip. |
 |
| Next, paint a greater then sign with black polish and a fine nail brush...like the picture above. This will represent the mad hatter's hat. Also using black, paint diagonal lines on top of your yellow tip. |
 |
| Next, fill in the black 'greater-than sign' with white. You can use a brush or a dotting tool to do this. |
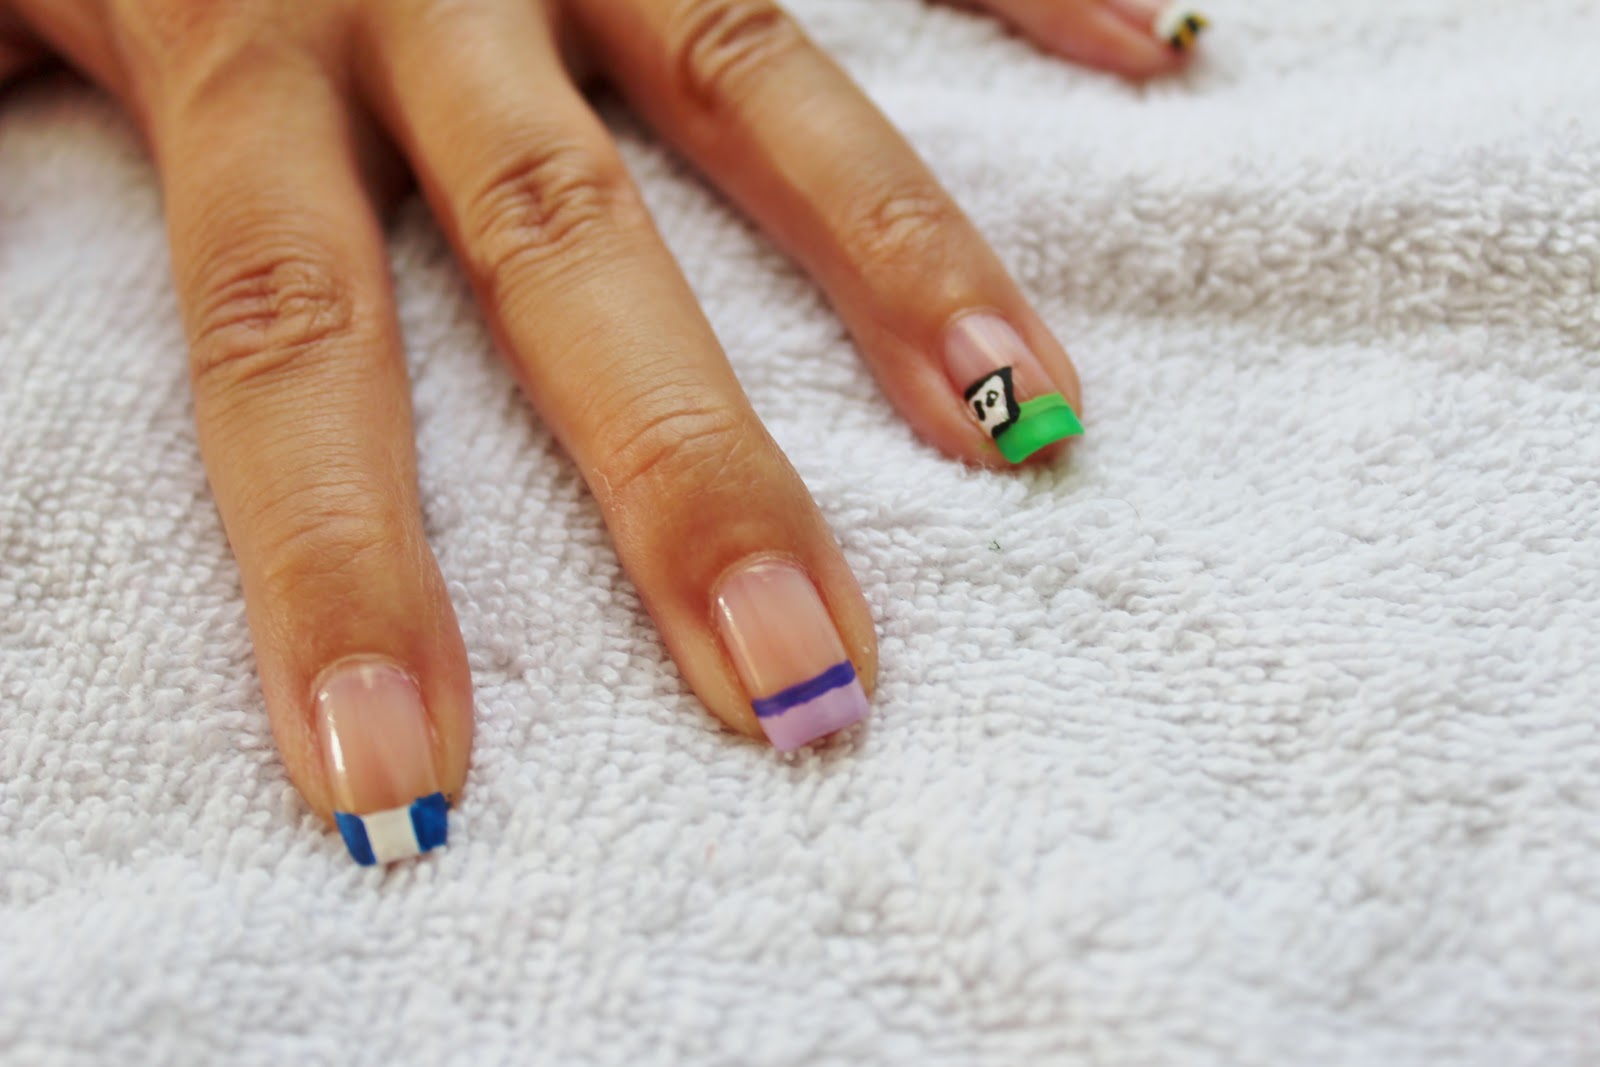 |
| Paint each side of the white tipped index fingers with blue. This is to represent Alice's dress. Also, paint a number (I used 10) into the mad hatter's hat with black and a fine nail art brush. |
 |
| Using red, paint two little hearts on your pinky fingers. This is for the Queen of Hearts. <3 |
 |
| Paint a thin black line on top of the blue and white tipped nails. Then two triangles opposite of each other to create Alice's black bow in her hair. On the middle fingers, paint the cheshire cat's big, wide 'ear to ear' smile. You will need to use a fine nail art brush, or the tip of a toothpick. This was the hardest part! Start with the black outline, and then fill in with white. Last, paint the thin black lines for the teeth. |
 |
| On your thumbs, paint a half circle and the watch clicker using yellow. Add a little black arrow for the hour hand and black paws for the white rabbit's feet. You can creative and do what you want! :) |
 |
| Apply your top coat and you're done! Enjoy! These are impressive when done! |


